Crazy paving has fallen right out of fashion; killed first by release of the modern mottle coloured concrete riven flags by Bradstone in the early 1980’s followed by the cheap imported stone flags from the Far East more recently. That said it still has its uses, particularly where an informal path is needed or a low cost solution to matching locally sourced stone. These days the likes of builders’ merchants no longer stock stone crazy paving so you will need to contact a local sandstone quarry. Sandstone is the preferred stone as it gives a good mix of workability, durability and slip resistance; although like all stone it can easily become slippery in the in the right conditions.
Equipment:
- Crazy paving
- Subbase
- Ballast or mixed sand and gravel
- Yellow sand
- Cement
- Cement mixer
- Shovel
- Wheelbarrow, or better still 2 wheelbarrows
- Bricklayer’s trowel
- Pointing trowel
- 4lb Hammer
- Cold chisel
- Tape measure
- Gloves
- String line and pins
Estimating Materials:
As a rough guide for every square metre of paving you will need about 100kg of ballast, 20kg of yellow sand, 14 kg of cement and 200kg of subbase. These are only approximate figures and should only be taken as a guide.
Summary:
- Mark out the area to be paved
- Dig out, removing the topsoil
- Set out the falls
- Make up to the level with subbase and compact it
- Set out the pieces of stone to see how they will fit
- Bed the stones onto concrete and point
- Clean up the pointing
- Mark out the area to be paved
How you chose to make the area out doesn’t really matter, you can get aerosols of paint, length of rope, sand or even a garden hose, but it will give you a change to check it’s the right size and in the right place. It’s easy at this stage to play around with the dimensions and be sure it is going to work. If is to be a path try it out, push any machinery along it to check is the right size and shape, if it’s to sit on put some chairs on it and have a sit. It’s much better to find any problems now than be left thinking if only.
- Dig out, removing the topsoil

The paving will need a solid base so remove any topsoil and if necessary dig further down so you are at least 225 mm below the finished level of the paving. If this does not take you down to firm stable ground then this depth needs to be increased, also in parts of the world where the winters are more severe that those experience in the UK again the excavation needs to be increased to prevent the ground under the paving becoming frozen and lifting the paving.
- Set out the falls
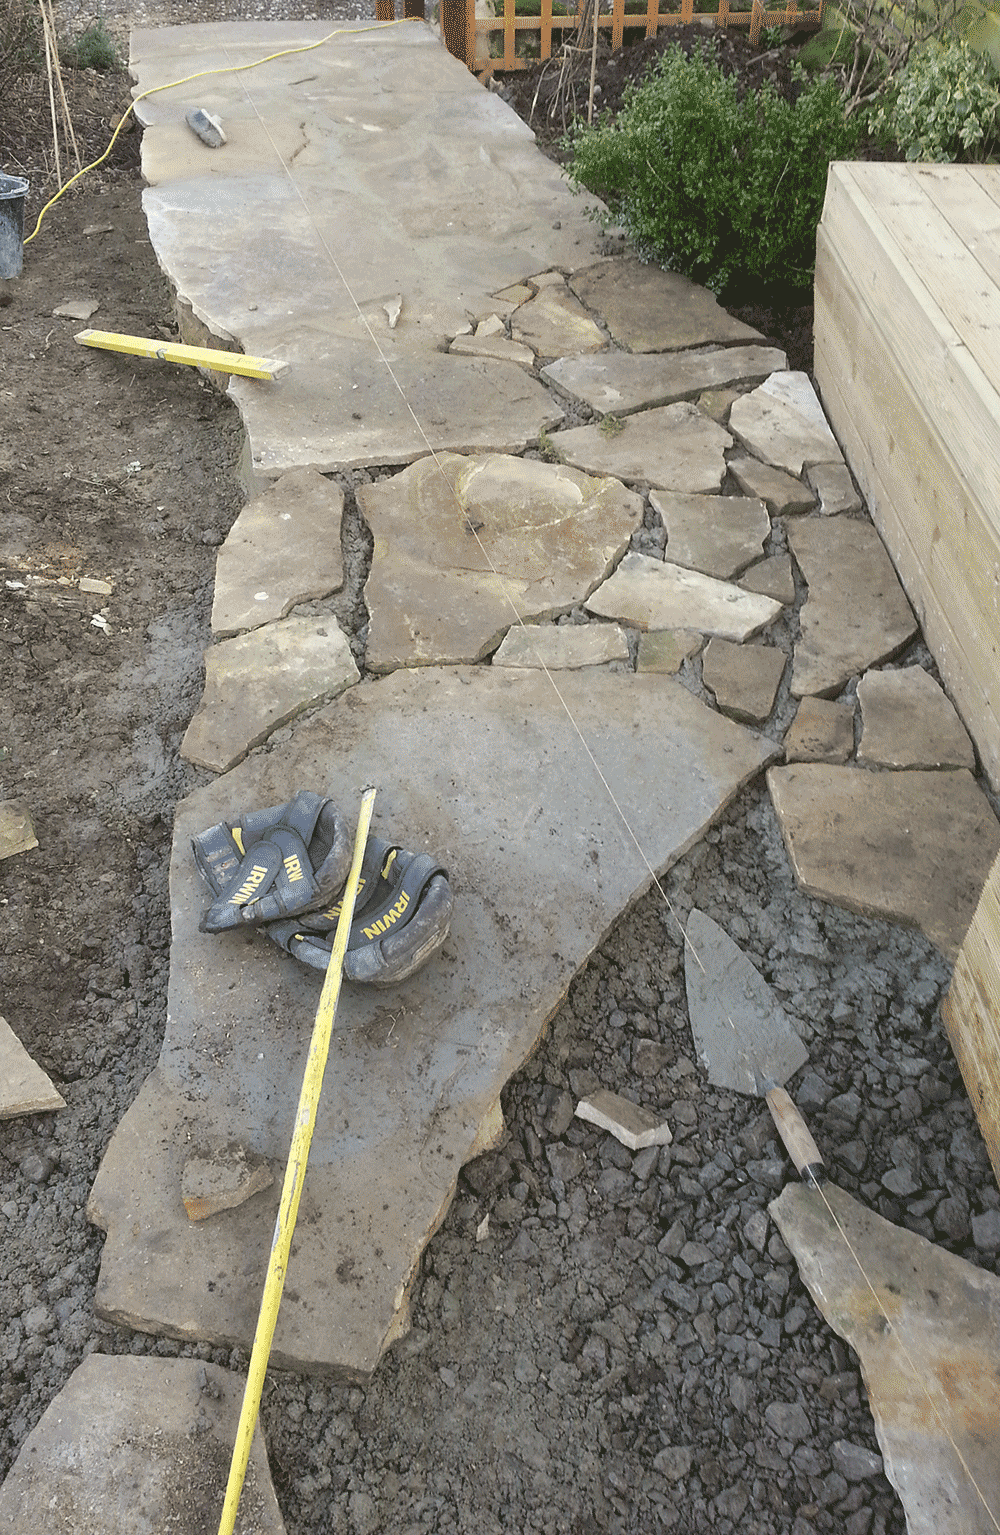
Due to the uneven surface of natural riven stone the paving should be laid to string lines. These lines should be set out at the level of the finish paving with one line at each side of the paving. These lines should set the fall on the paving for its surface to drain.
- Make up the level with subbase
Spread sufficient subbase over the area excavated in part 2 above up to bring it to within 125 mm of the level set up by the lines in part 3 above, making sure to compact the subbase well. Small areas can be compacted with a sledge hammer but for larger areas it’s worth hiring a vibrating plate. Remember, don’t try to compact more than a 150 mm thick layer at a time.
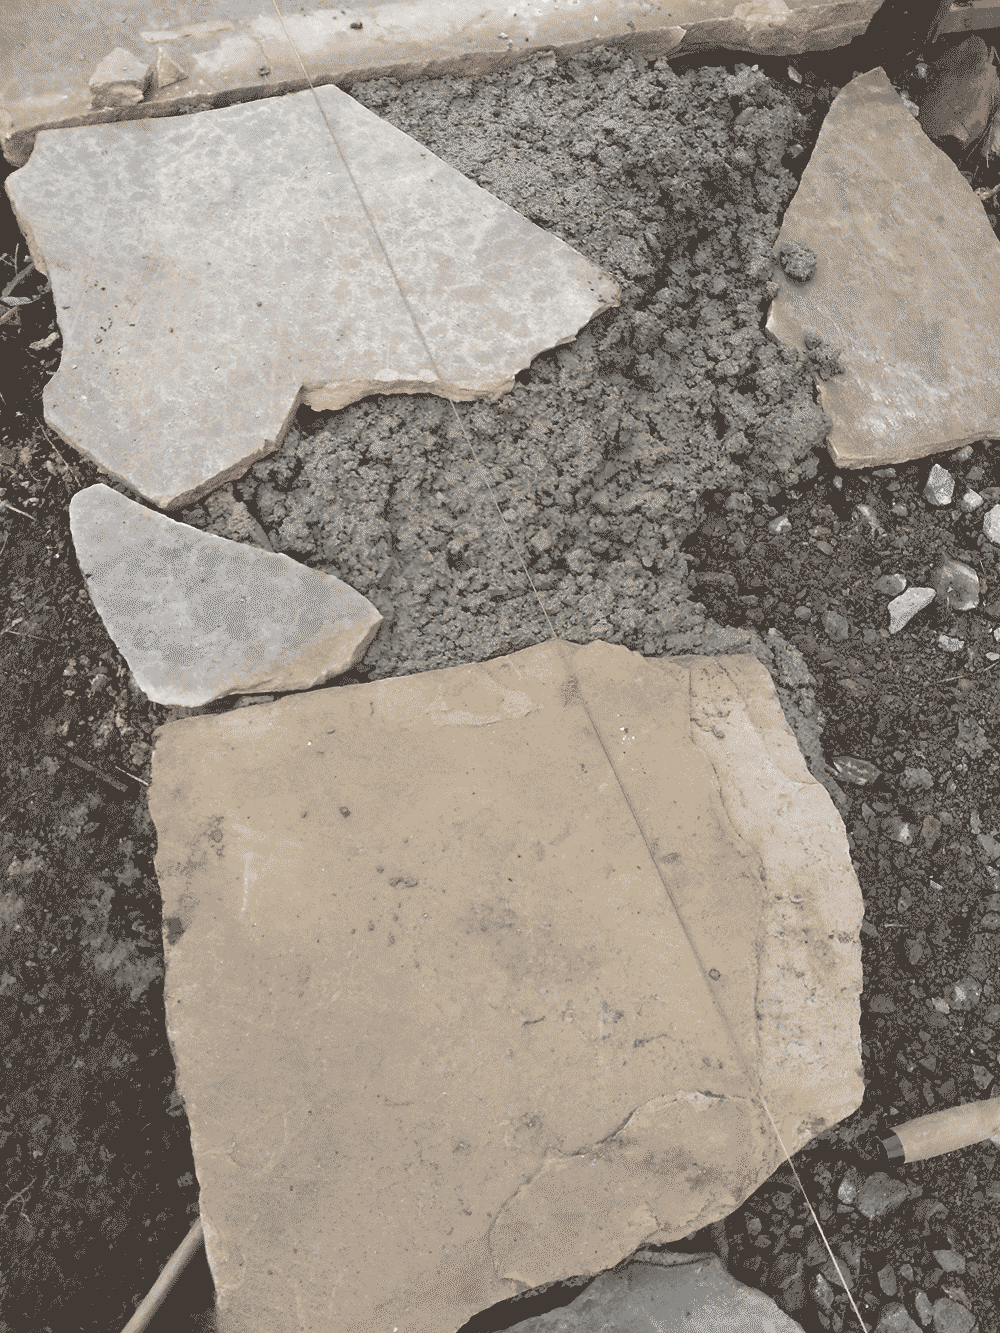
- Set out the pieces of stone to see how they will fit
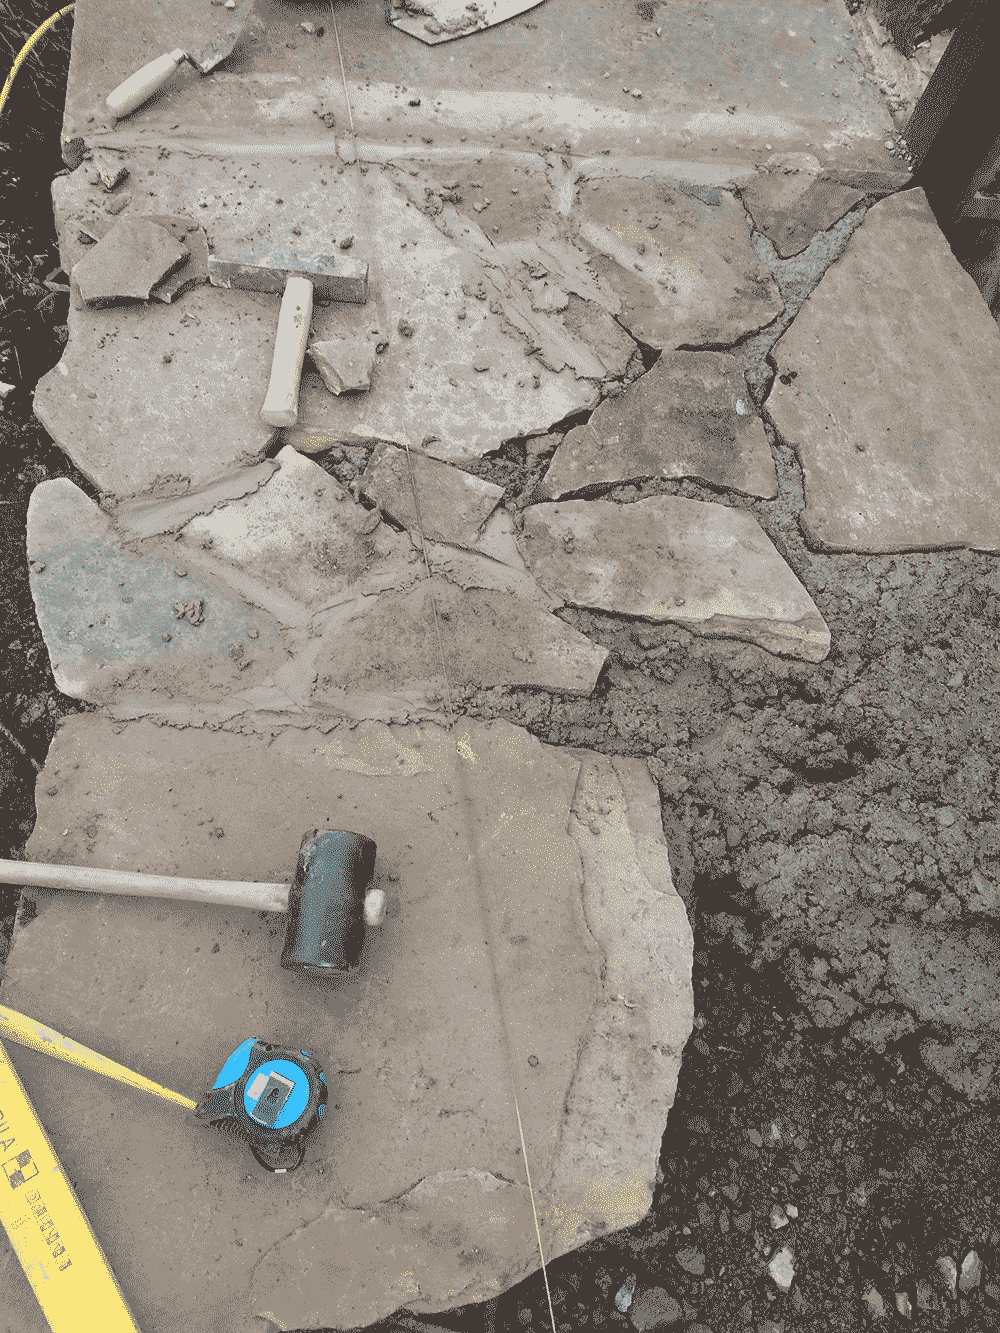
Before you actually start laying the stones set them out in place to see how you are going to fit them together. Start with the largest pieces along the edges and fit the smaller ones in to suit, you don’t need to arrange every piece but it will help if you know how you are going to fit them together as it is rather like a giant jigsaw puzzle with no picture to go by.
- Bed the stones onto concrete and point
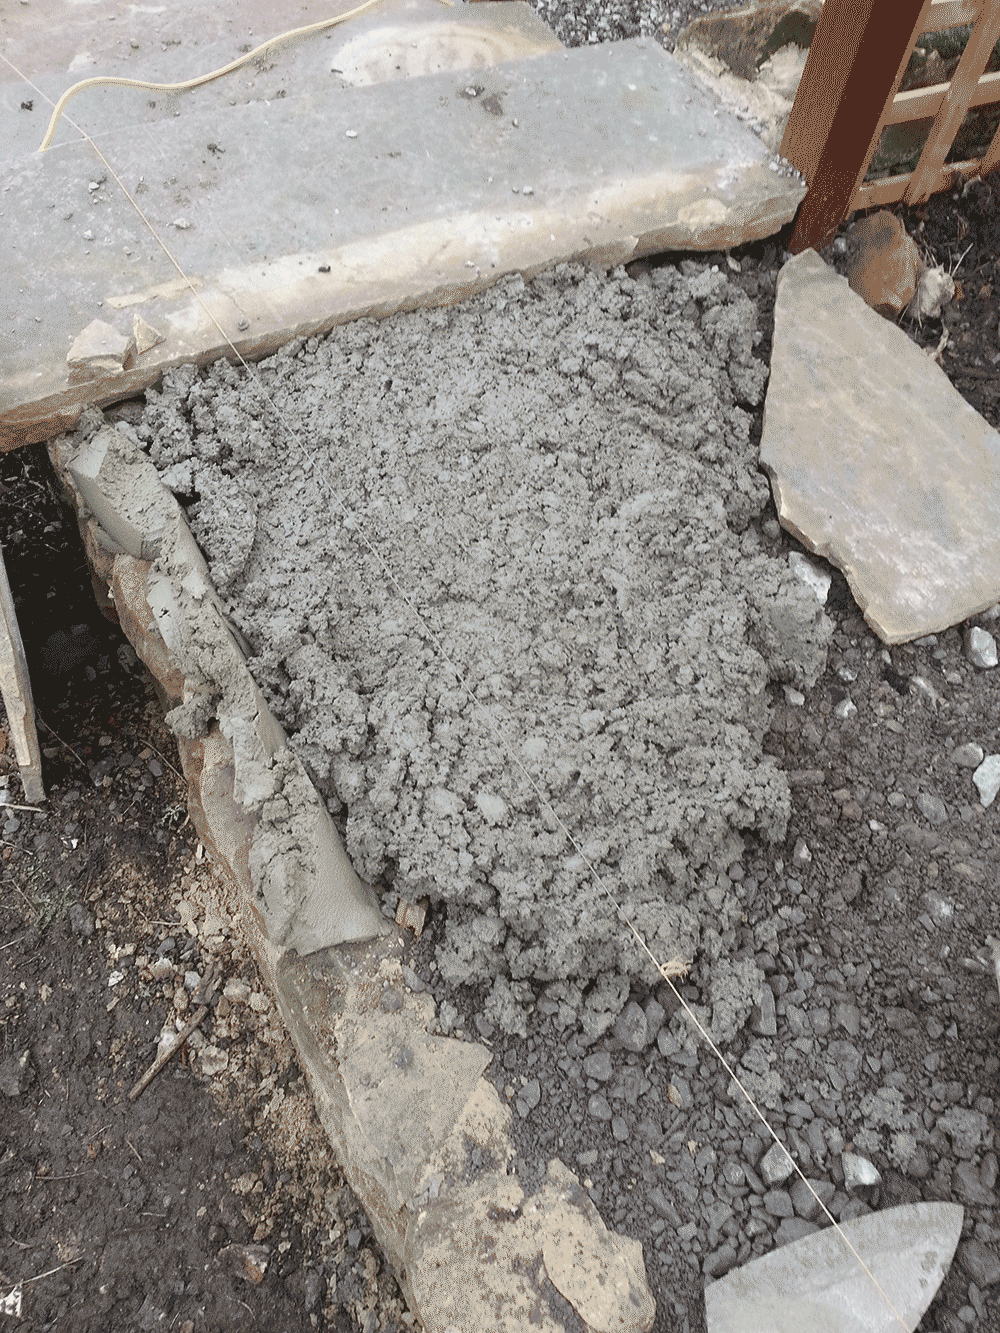
Move the stones to one side, you may wish to take a quick picture first to remind yourself, and mix some mortar using 6 parts of yellow sand to 1 part of cement and put the mixed mortar to one side. This is where a second wheel barrow comes in useful. Now mix a load of concrete using 6 parts of ballast to 1 part cement and spread it over a corner of the area you’re going to pave. Start at the far side and think carefully about out you are going to work without painting yourself into a corner. Once you have some concrete mixed and spread start placing your stones onto it. You may have to adjust the thick of the concrete as the stone will vary in their thickness; but once you are just above the level of you string lines you can tap the stone down with a rubber mallet or by placing a block of wood on them and hitting it with a heavy hammer. Once bedded into the concrete the top of the stones should be just below the surface of the lines and following the fall you created with the lines.
Once you have 2 or 3 stones down start to point between them using the mortar you mixed at the beginning, this way the pointing will get good bond with the concrete the flags are pointed on and be less likely to come loose. Continue spreading the concrete, laying the flags and pointing them as you go. You will probably find you will have to use a hammer and cold chisel to get the pieces all to fit together, particularly the smallest ones.
The reason the mortar was mixed first was because if you don’t clean out the mixer when changing from mixing from mortar to concrete you will end up with lots of bits of gravel in the mortar which courses problems. This is not a problem going the other way.
- Clean up the pointing
When first used the mortar the paving is pointed with will be very wet, so once the joints are filled with mortar leave it to firm up (“go off”) a bit and then tidy it up with a pointing trowel. How long you will have to leave it will depend o the weather and in hot summertime it could be minutes while in winter it can take until the next day.
It is quite possible there will still be some mortar stains left and these are best clean up with brick acid. Carefully read and follow the instructions that come with it but for bets result let the mortar have plenty of time to harden first. Wet the paving with a hose pipe before pouring on the acid and then scrub it with a stiff bristled broom. Once the stains are removed rinse the area thoroughly with clean water.
2 responses to “How to lay crazy paving”
What’s crazy paving in the first place? While I’ve always been big on paving and everything surrounding it, this is my first time hearing about Indian paving. Any leads, people?
Hi Greg,
I think the term “Crazy Paving” is probably a UK one but I’m sure you will have come across it under a different name. It’s a way of using up irregular/broken pieces of paving to make paths and paved areas. It looks best when made from sandstone, but I have seen it created from broken concrete slabs. Its advantages are that the paving material is a lot cheaper than flags that have been cut or manufactured to size and it is easy to created curved paving. It was a lot more popular in the past due to it relative low cost, but fell out of favour once manufactures, such as Marshalls and Bradstone in the UK, started selling the dyed riven concrete flags. “Indian” flags came along later and the term refers to natural stone flags quarried and cut to size in the far east and because of the relative labour costs these were able to under cut the best manufactured flags in the UK.
Regards,
Mark