The important thing to realise is that you will kill a tree before you get it in the ground or after you’ve planted it, to actually kill a tree when planting it is very difficult.
Equipment:
- Tree
- Spade
- Outdoor clothes
- Tree stake
- Tree tie
- 25 mm nail or screw
- Planting compost
- Hammer or screwdriver
- Large hammer (sledge hammer or fencing mallet)
- Secateurs
- Tape measure
- Saw
In Summary
- Start with a good quality plant of an appropriate size.
- Protect it, especially the roots, from drying out and frost.
- Clear a 600 mm radius circle for the tree to be planted in.
- Dig a hole easily big enough to take the roots.
- Mix some compost into the soil you have dug out.
- Place the tree in the hole and position the stake so that it fits between the tree roots and is about 50 mm (2 inches) from the tree trunk.
- Remove the tree and carefully hammer the stake into the ground until it is really firm.
- Put the tree back in the hole and refill it with the soil you dug out.
- Attached the tree to the stake with a tree tie at about 300 mm (1 foot) above ground level and cut off the excess tree stake
- Water the tree with 2 or 3 buckets full of water.
- Keep the ground under the tree clear of all other plants and weeds for at least the next 12 months
- Water the tree as needed throughout the next summer.
- Start with a good quality plant of an appropriate size.
Assuming you’ve decided on the tree you’re going to have in the garden the first step is going out and buying it. Here the old adage applies “you get what you pay for”; pay a cheap price and you’ll get cheap/poor plant. So go to a good nursery with knowledgeable staff who’ll help you choose a tree suitable for you and your garden. You will find the trees will be available in a range of sizes organised into bands generally 20 cm or 25 cm wide. What often confuses people is that trees are sold by high only up to about 2 to 2.5 metres high and thereafter by the girth, which is the measurement around the trunk at 1 metre above the ground and the height is ignored. Containerised trees may also, or alternatively, be priced according to the size of the container.
In practice go for something about 1.8 to 2.0 metres high. This provides a good compromise between the smaller the plant the quicker it will establish and grow away, and something which looks “tree like” in size and shape. Don’t forget you’ll need a tree stake, tie and some planting compost.
- Protect it, especially the roots, from drying out and frost.
For most people getting the tree home will involve putting it in the family car. Make sure any exposed roots are cover with a plastic bag to stop them drying out and lay the tree through the car, being very careful to protect the bark from rubbing and crushing especially if it ends up hanging out of the back of the boot. DO NOT put it through the sunroof, no tree is going to be in a very good condition after been subjected to a 60 mph gale! Once home it’s quite possible you don’t have time to plant the tree straight away, not to worry, just put it out of the sun, safe from frost and with the roots protected from drying out. If there is no danger of frost it will be fine in overnight in a shady corner with its roots in the plastic bag. If there is a danger of frost put it in a frost-free shed or garage for the night; but nowhere to warm, you what it to stay dormant.
- Clear a 600 mm radius circle for the tree to be planted in.
As soon as you can you what to get the tree planted. Chose you place carefully 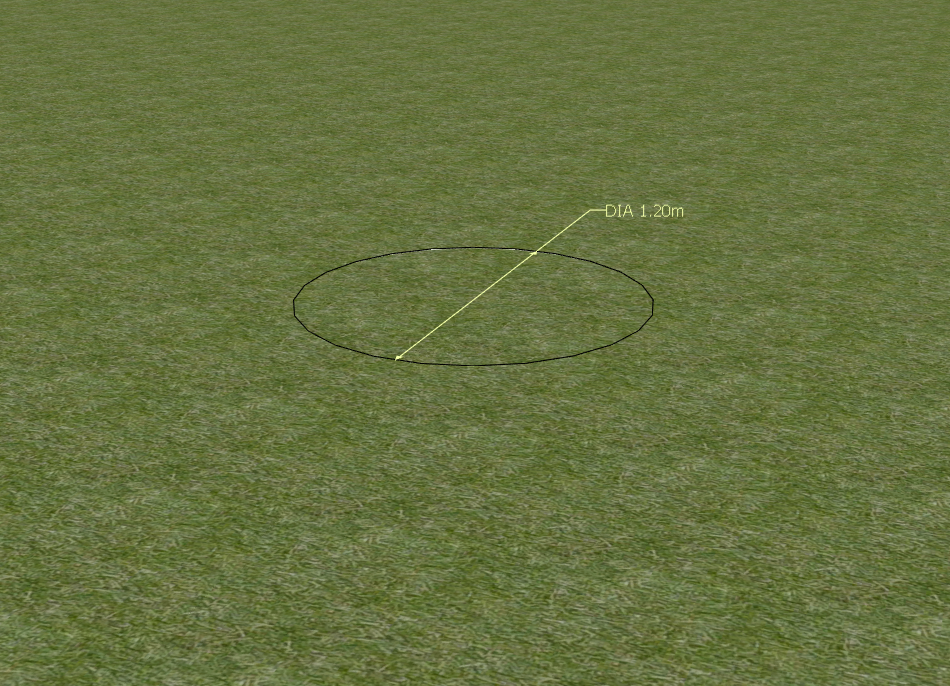 considering how the tree is going to grow over the coming years. There needs to be plenty of space for it not just now but in many years to come when it will be a lot bigger. Consider what is under the ground as well. Make sure you are not planting it on top of an old tree stump or buried concrete or hard-core pad. Check you a clear of drains, power, gas, and telephone or any other services; as well as being away from any foundations.
Once you are happy with the place; clear a 600 mm radius (2 feet) circle around where the tree is going to be planted to create a 1.2 metre (4 feet) diameter circle of bare ground. It is very surprising how much a tree will suffer if it has to compete with any other plants especially a lawn.
- Dig a hole easily big enough to take the roots.
Dig a nice big hole the tree’s roots will comfortably fit into without them touching the sides  of the hole. You may find it easier to put the soil you dig out onto a piece of old board or plastic. Take the tree roots out of their bag and check them for any damage. Any broken pieces cut off cleanly with a pair of secateurs and place the tree in the planting hole checking its deep enough so that the tree will be at the same depth as it was in the nursery.
- Mix some compost into the soil you have dug out.
Nearly every soil is improved by having some compost/organic matter added to it, REALLY any soil other than a peat one will be improved if you can mix some compost into it. The type of compost isn’t nearly as important and any of the bagged composts in garden centres and the like, as well as any well rotted garden compost or manure will be just as good. Mix sufficient in to make the soil break into crumbs easily and if it is very heavy some course grit, say about 3 mm in size will do, will help as well.
- Place the tree in the hole and position the stake so that it fits between the tree roots and is about 50 mm (2 inches) from the tree trunk.
Take the tree out of it packaging and place it in the hole you have dug. Now take your tree stake and position it between the tree roots and next to the tree’s trunk, BUT leaving enough space of the tree tie to fit between the tree and the stake. Tree ties vary but they all have a way of cushioning between the tree and the stake, generally a collar the tree tie passes through or some thread through themselves.
- Remove the tree and carefully hammer the stake into the ground until it is really firm.
Put the tree to one side, double check there is nothing buried below and drive the tree 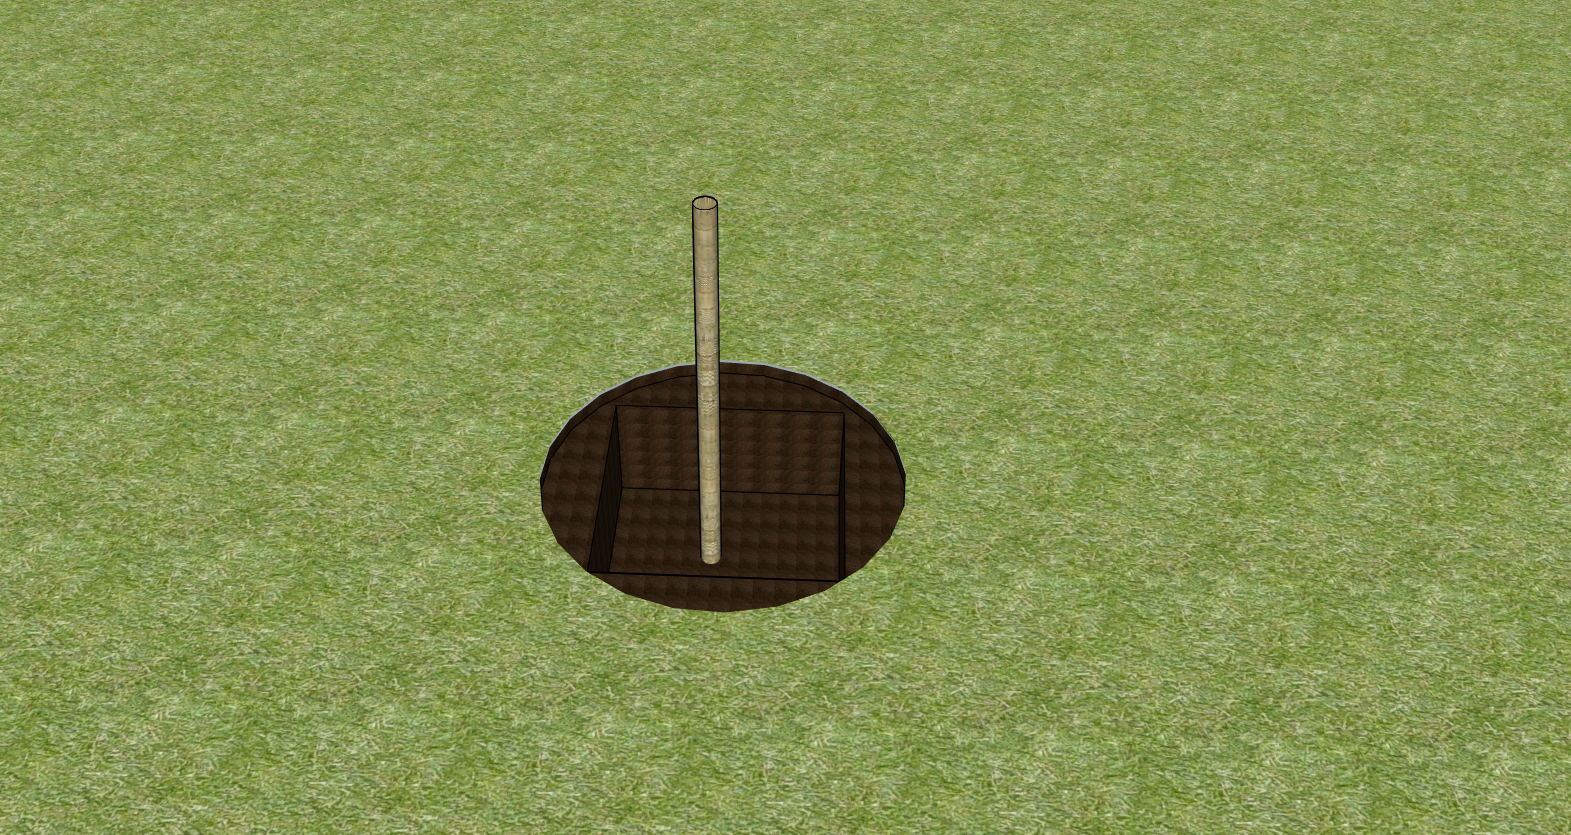 stake into the ground. Start the stake off by making a hole for the point so it stands upright, don’t be tempted to hold the post as someone tries to hammer it! Drive the post in, regularly checking its vertical, until the post is really firm. There are a number of ways to do this:
A post driver, this is a heavy metal cylinder with one end blanked off and handle on each side. They are used by placing them over the post (the difficult part as they are heavy) and lifting them up and slamming them down on the post.
A fencing mallet, these are either similar to a sledge hammer and are either wood or metal. It can be difficult to hit the post square with one and you will need to stand on something to be at the correct height so care has to be taken!
A sledge hammer, most people have one of these and the same applies to these as a fencing mallet but they have a greater tendency to split the sake.
- Put the tree back in the hole and refill it with the soil you dug out.
Place the tree back in the hole next to the tree and start back fill the hole. Shake the tree as you go to get the soil in among the roots and firm it well with your heel. The tree absorbs water and nutrients from the soil in contact with its roots so you want to end up with as much of the roots in direct contact with the soil as possible.
- Attached the tree to the stake with a tree tie at about 300 mm (1 foot) above ground level and cut off the excess tree stake
Once the soil is filled back up to the original level attach the tree to the stake with a tree 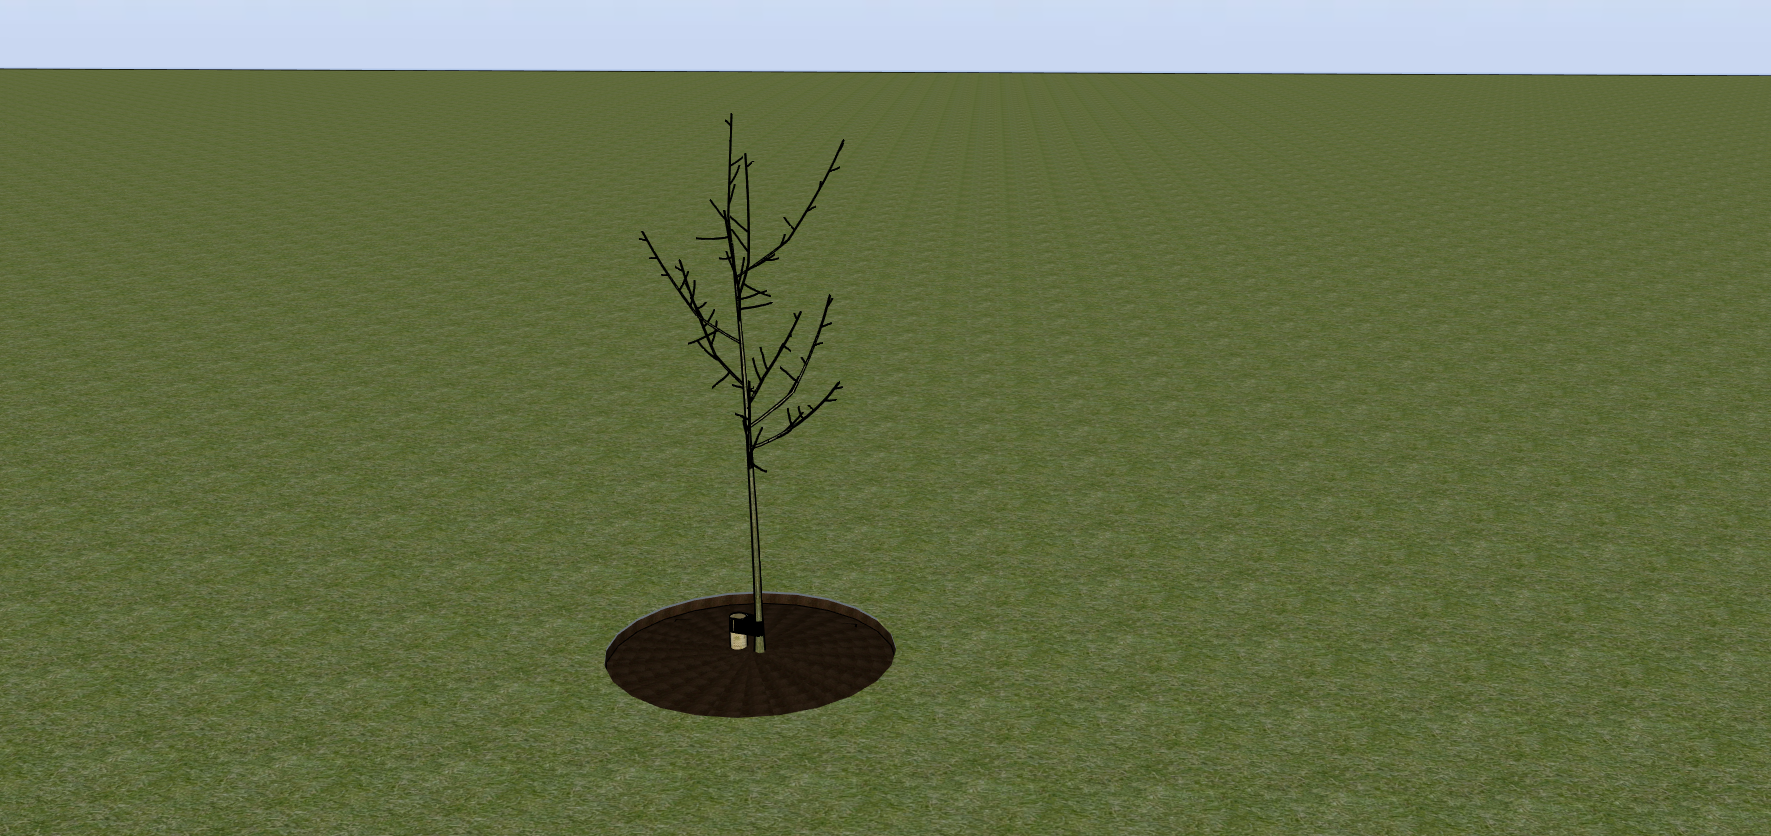 tie. Most tree ties consist of a length of plastic belt with a buckle at one end and a collar the tie passes through. Thread the belt through the collar, around the tree about 300 mm (1 foot) above the ground level[1] and back through the collar. Attach the end of the belt through the buckle and arrange it so the buckle is against stake and secure it there with a screw[2] through it into the stake to stop it sliding down. Once the tree tie is fitted saw the stake about 50 mm (2 inches) above the tree tie.
- Water the tree with 2 or 3 buckets full of water.
To finish water the tree well, the tree is unlikely to be taking up much water at this stage but it helps to further settle the soil in around the tree roots.
- Keep the ground under the tree clear of all other plants and weeds for at least the next 12 months.
As said above plants around the base of a new tree are a source of serious completion for water and nutrients so it is Important to keep the area originally cleared free of other plants until the tree is well established. Far more plants die as a result of being overwhelmed by completing weeds and plants than anything else.
- Water the tree as needed throughout the next summer.
The act of transplanting a tree results in it losing a lot of its root, particularly the very fine roots which actually take up the water and nutrients. Therefore it is important to keep watering the tree if there is any danger it might be getting short of water. When you do make sure your give it plenty of water, say 2 or 3 buckets full, or all you are doing is wetting the surface and none will get down to the roots.
[1] There is a surprising amount of disagreement over the height at which a tree should be staked but personally I feel staking low down is preferable as the only purpose of the stake should normally be to compensate for the factor that a transplanted tree’s root cannot at this stage anchor the tree and the swaying of the tree will encourage good trunk development. Many people would stake the tree higher up the trunk and if you would rather then please feel free to do so.
[2] In the past this was done with a short nail but as you hammer the nail in it tends to spring about so I now feel the wide spread use of battery drill drivers makes it much easier to use a small screw for the purpose.