
Equipment:
- 100mm by 100mm post (4 inches by 4 inches)
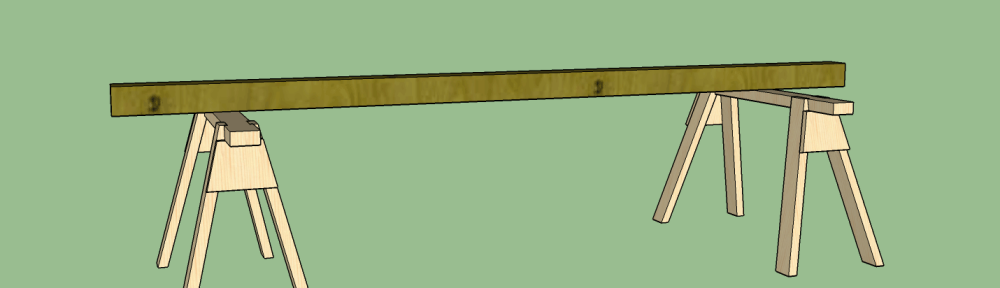
- A pair of sawhorses or similar to rest the post on
- Handsaw
- Carpenter’s or combination square
- Pencil
- Tape measure
- Drill
- Large wood bit (about 20mm or ¾ inches)
- Sharp wood chisel and a hammer
Summary:
- Place the post on a stable surface raised off the ground.
- Mark a line 150mm down from the end of the post on opposite sides.
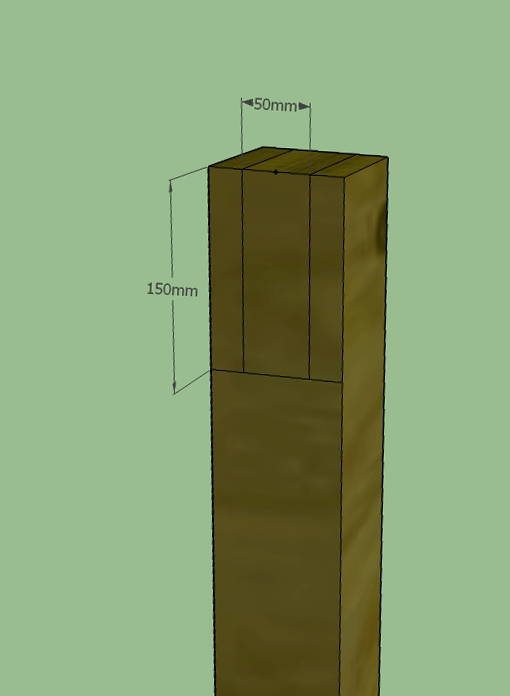
- Find the centre of one of the marked sides and measure 25 mm out from this.
- Mark a line from this point between the end of the post end and the first line.
- Repeat 25 mm from the centre the other way.
- Complete this over the end of the post and down to the horizontal line at the opposite sides of the post.
- With the hand saw cut diagonally from the top corner down to the first line and the bottom of the post end.
- Turn the post over and complete the cuts down to the first lines.
- Mark a line half the diameter of the drill bit parallel to the first cut.
- Drill a row of over lapping holes along this line between the saw cuts.
- Complete the holes from the other side.
- Remove the waste wood to form a flat base.
- Cut the post to the desired length.
- Place the post on a stable surface raised off the ground.
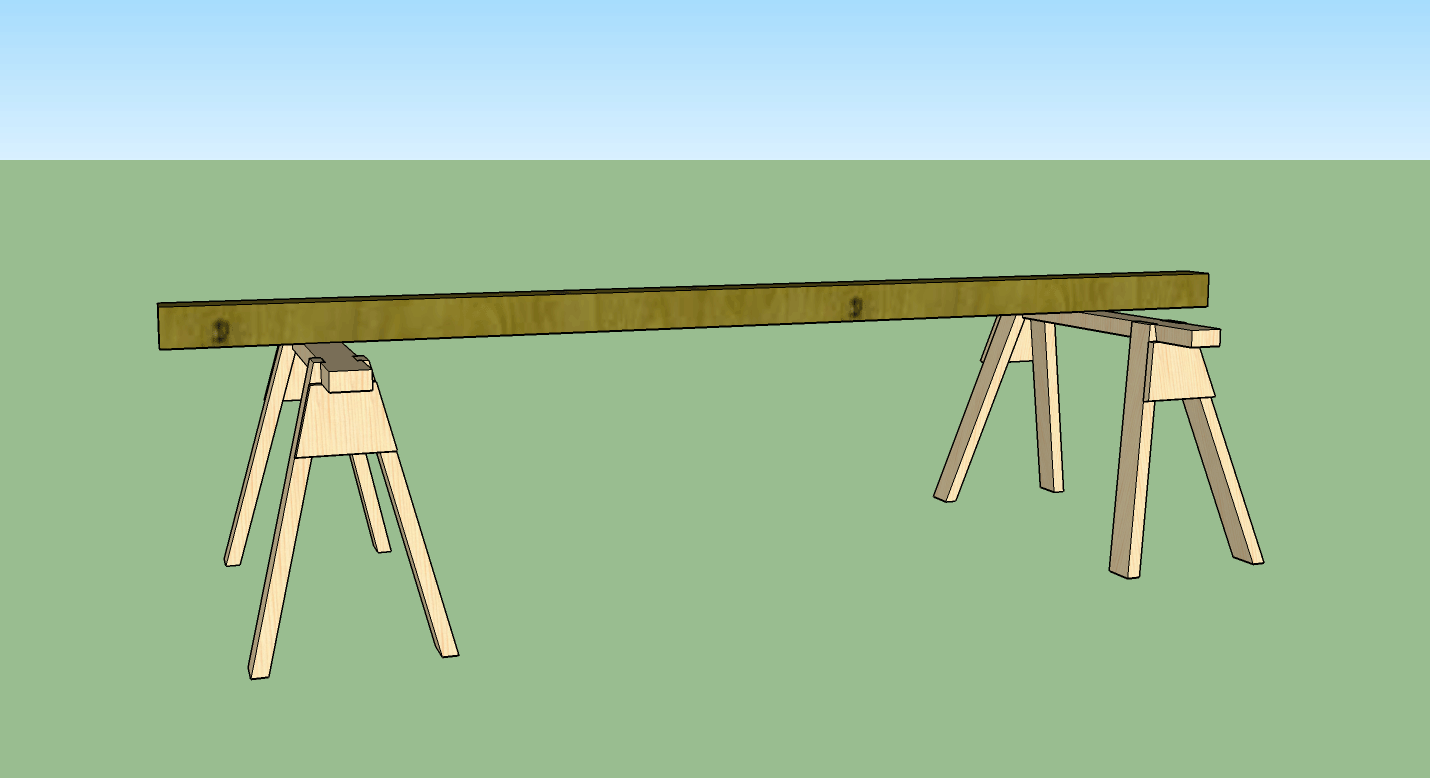
To work safely and well you need the post on a stable and strong support at a comfortable height to work at. If you don’t have any sawhorses most DIY stores sell foldable ones. You may also find it helpful to clamp the post to the sawhorses to make it more stable.
- Mark a line 150 mm down from the end of the post on opposite sides.
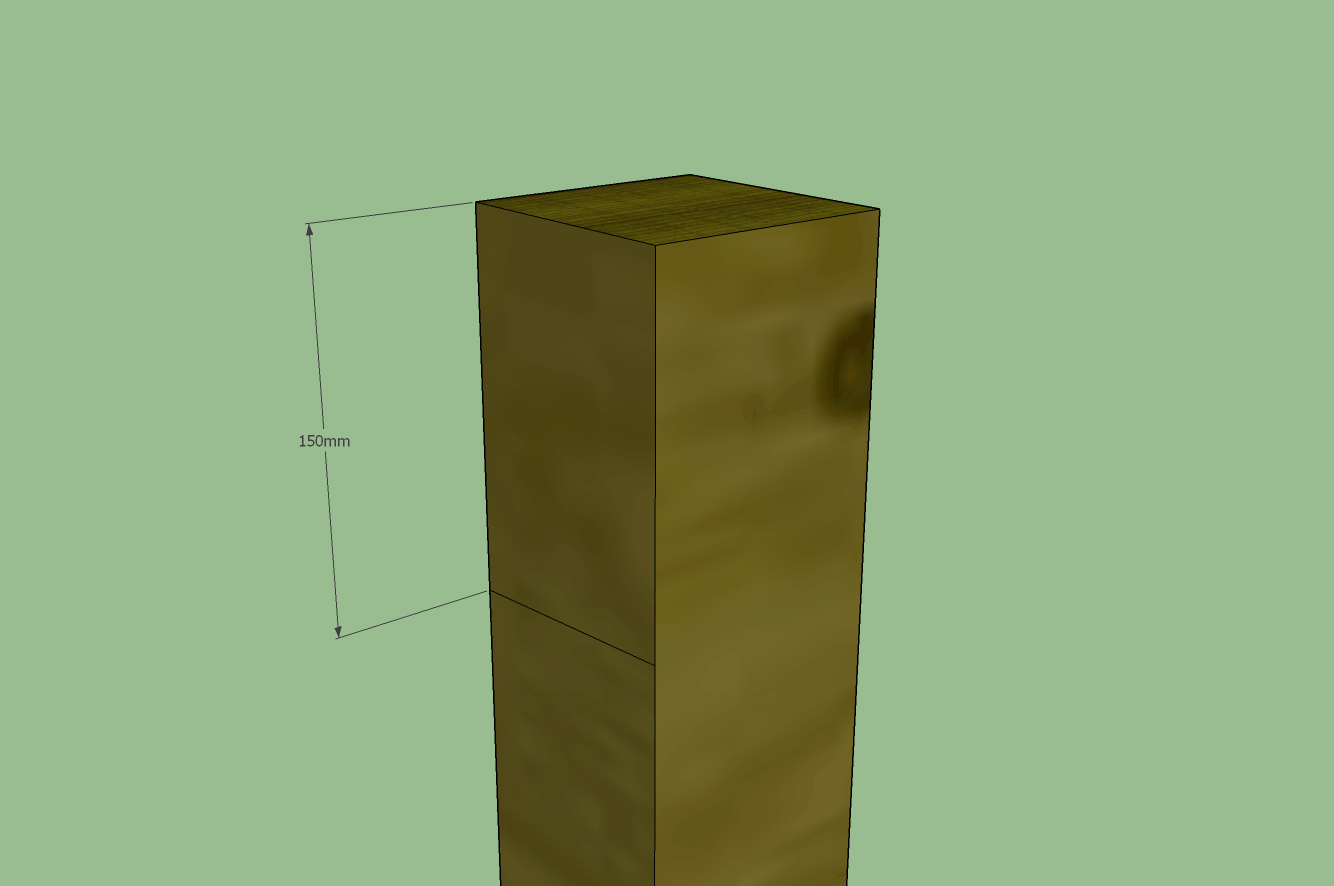
If you are using a 150 mm by 50 mm horizontal beam the bottom of the beam is going to be 150 mm down from the top of the post, this distance can be adjusted for different sized beams. When marking the posts bear in mind you are using sawn timber and so it probably will not be perfectly square and you may have to adjust your lines accordingly.
- Find the centre of one of the marked sides and measure 25 mm out from this.
Though sold as 100 mm by 100 mm the posts will not be exactly this so measure carefully where the centre of the post is or you will end up with the notch off centre.
- Mark a line from this point between the end of the post end and the first line.
This is going to be one the side of the notch so the line joins the first line with the end of the post.
- Repeat 25 mm from the centre the other way.
This forms the other side of the notch.
- Complete this over the end of the post and down to the horizontal line at the opposite sides of the post.
This marks out the shape of the notch in the top of the post. Be very careful are the sides of the post and the top of the post will probably not be perfectly square.
- With the hand saw cut diagonally from the top corner down to the first line and the bottom of the post end.
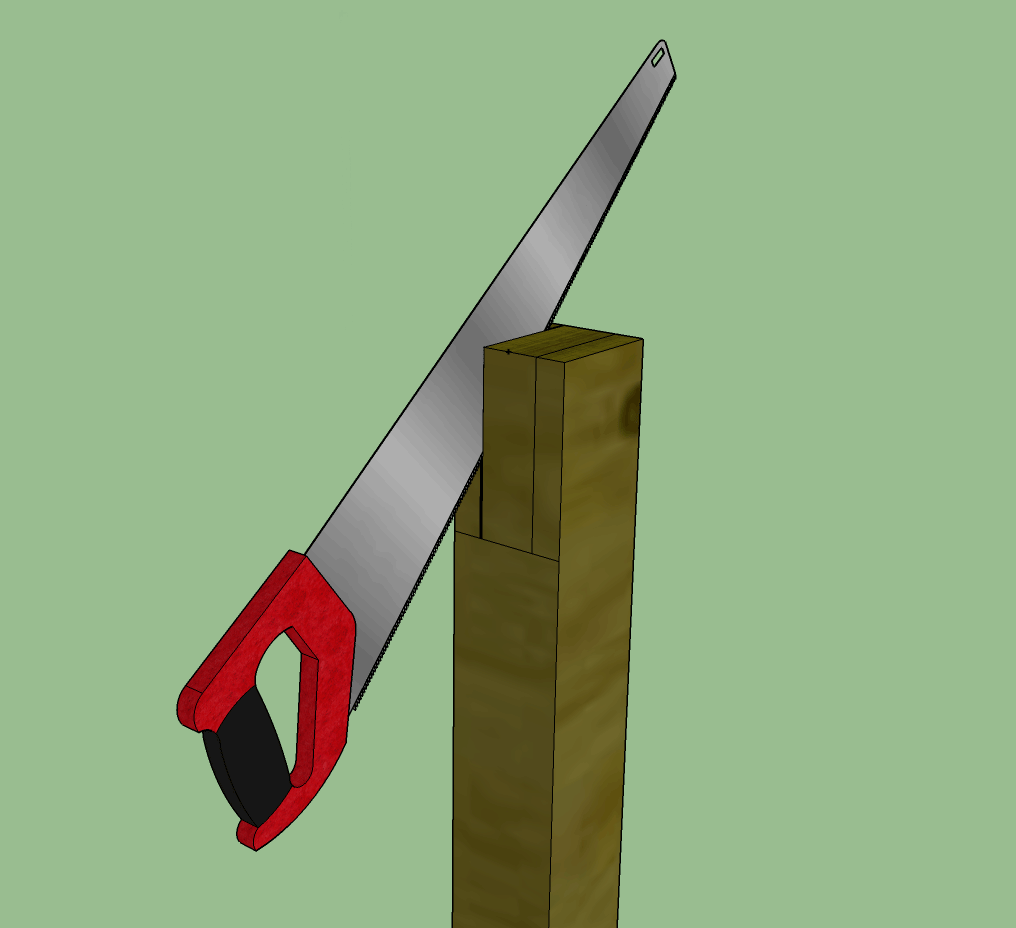
When you start to cut the post start on the inside edge of the line. The saw cut has a width, be it only a few millimetres so you what the outside edge of the cut to follow the line. Take your time and only cut as far as you can see otherwise you have no idea where the saw is going and if it’s following the correct line.
- Turn the post over and complete the cuts down to the first lines.
Once you have cut down the two line on one side turn the post over and complete the cuts down to the first mark you made in part 2 above. The cuts you made in part 7 above will guide the sawn blade on the underside you now cannot see.
- Mark a line half the diameter of the drill bit parallel to the first cut.
This line will give you a guide so that when you drill into the post you will not end up cutting below the bottom of the notch.
- Drill a row of over lapping holes along this line between the saw cuts.
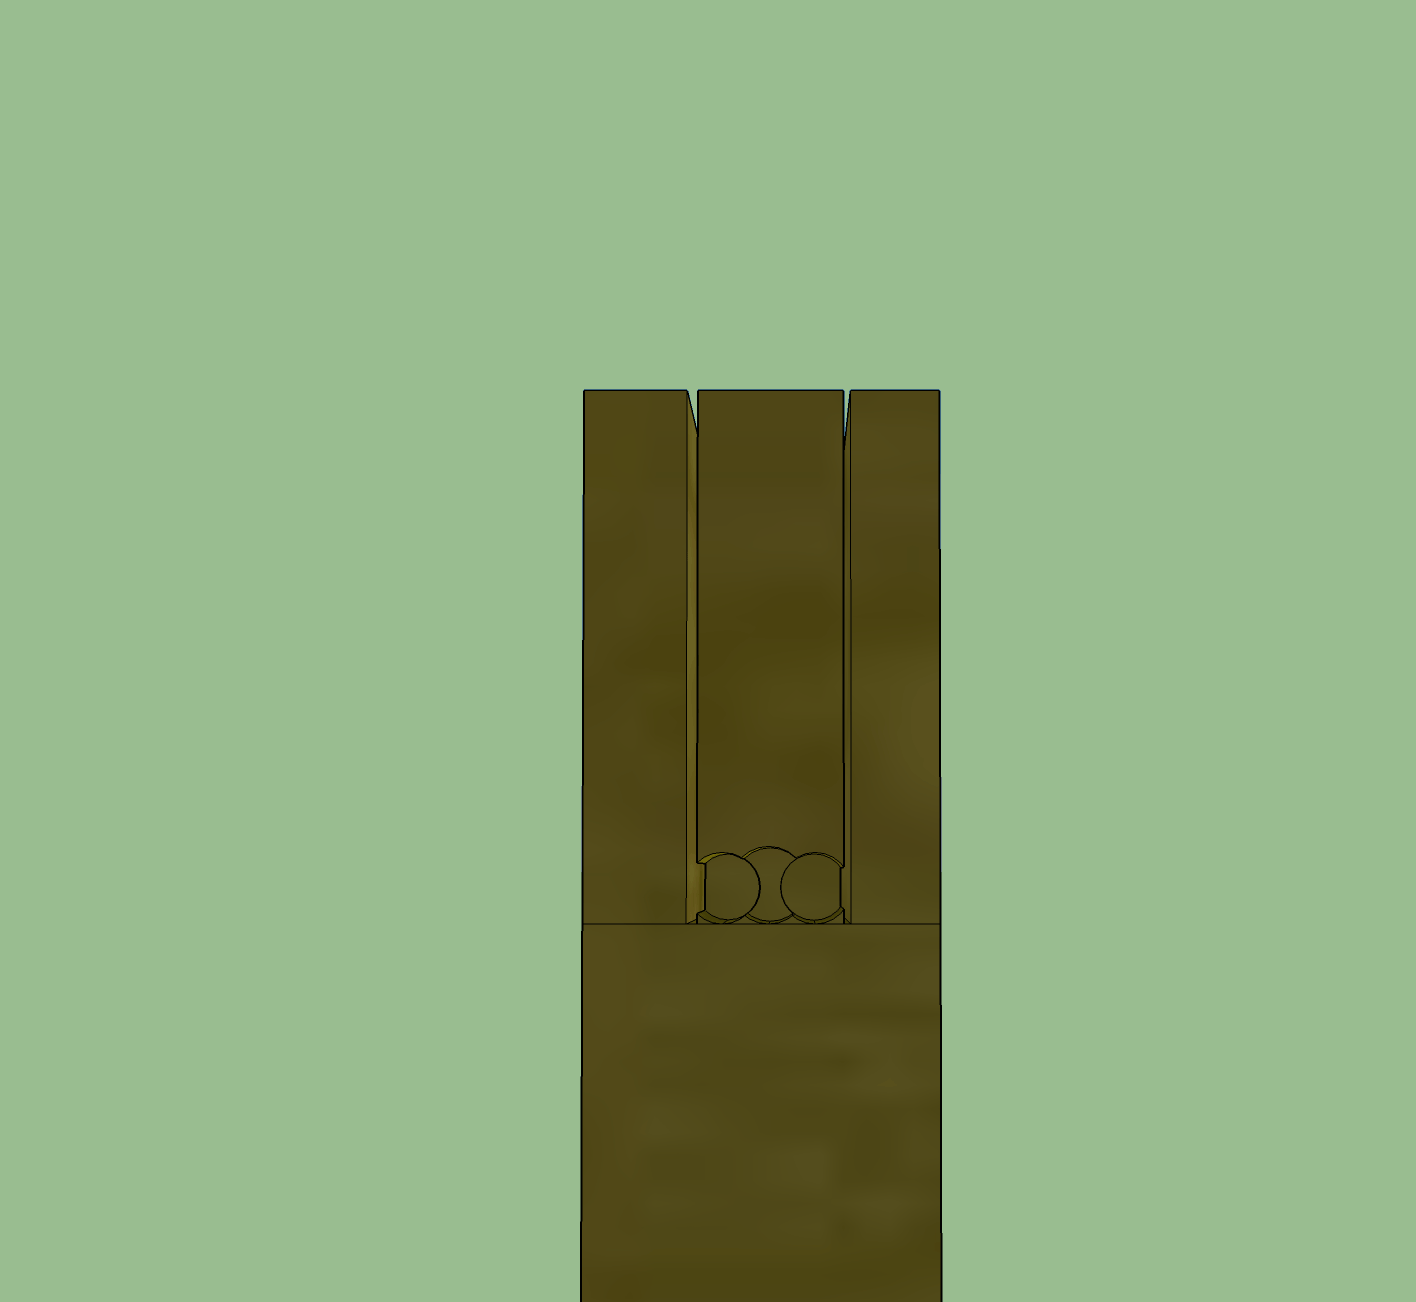
Make sure your drill holes fit between the cut lines for the sides of the notch, you are aiming to cut through the piece of waste wood between the sides of the notch to remove it. Be very careful to keep the drill bit square to the post and only go about halfway through the post.
- Complete the holes from the other side.
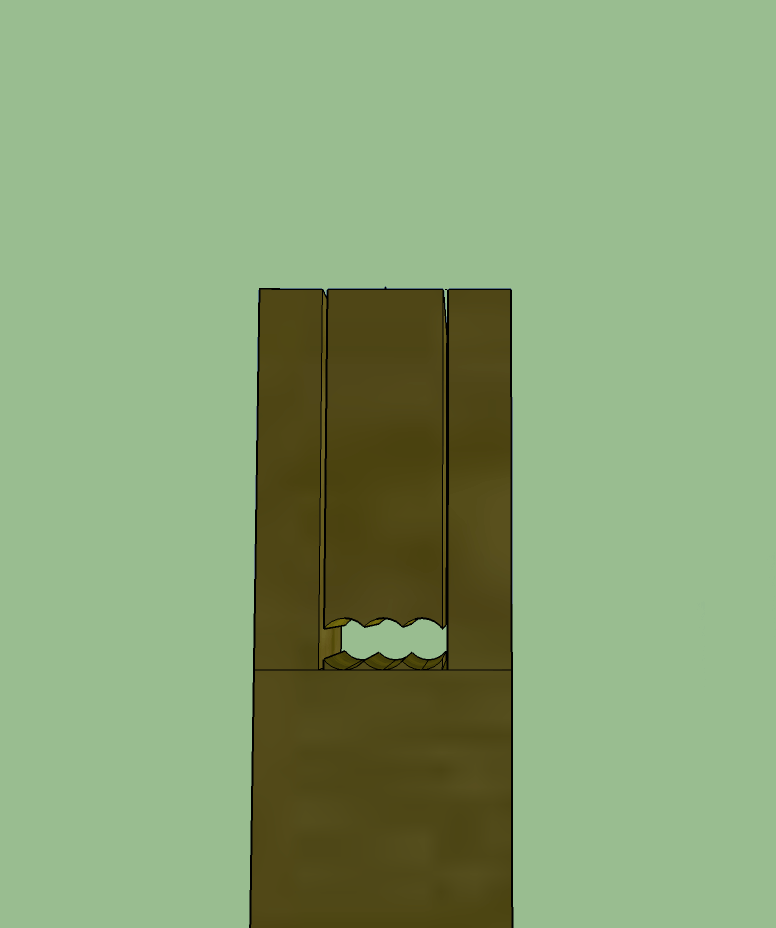
Turn the post over and repeat the above two steps but this time drill though so that the hole on both side join up.
- Remove the waste wood to form a flat base.
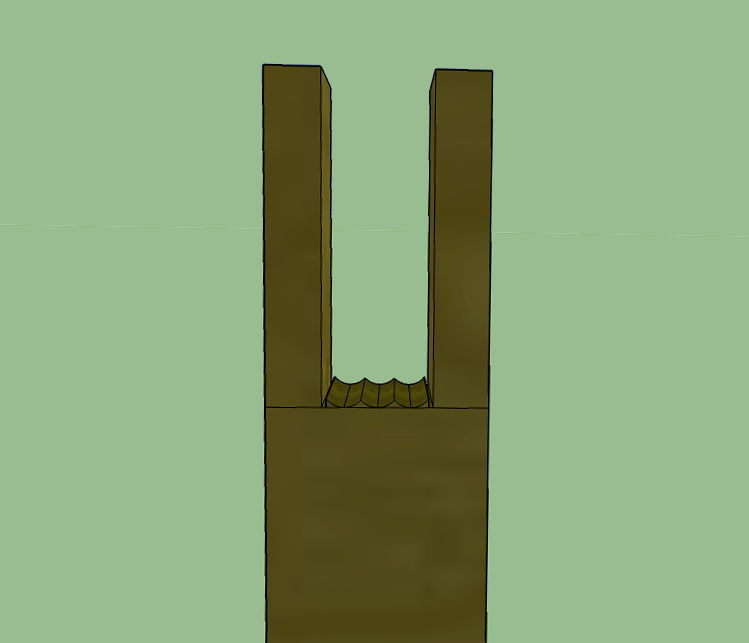
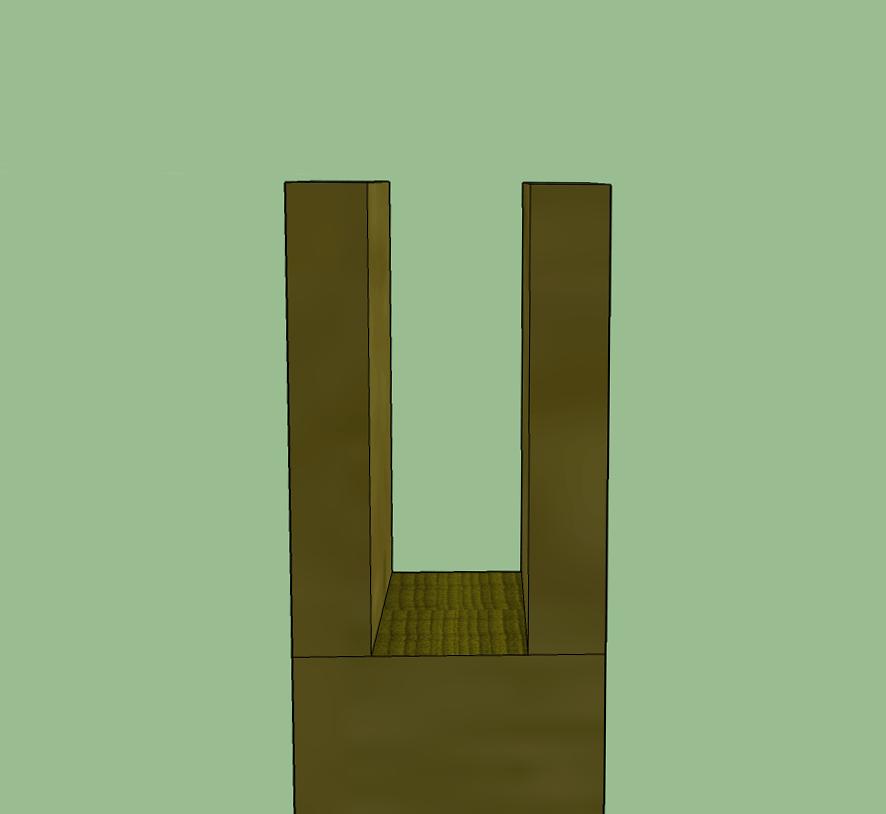
The wood above the drill holes should come away easily with any splitting and the bottom of the notch can be tied up with a sharp chisel. Make sure the bottom of the notch does not rise up, if it’s a little low than the outer edges it will not be seen.
- Cut the post to the desired length.
Finally check the height of the post, including the part in the ground and cut it to length. This is best done last as if the worst does happen and the notch goes wrong you should still be able to turn the post around and have a second attempt.