
Retaining walls are never cheap or easy but building one from timber railway sleepers is probably as cheap and easy as you are likely to find. As the sleepers are simply screwed together their construction is well within the abilities of most people without any specialist building experience.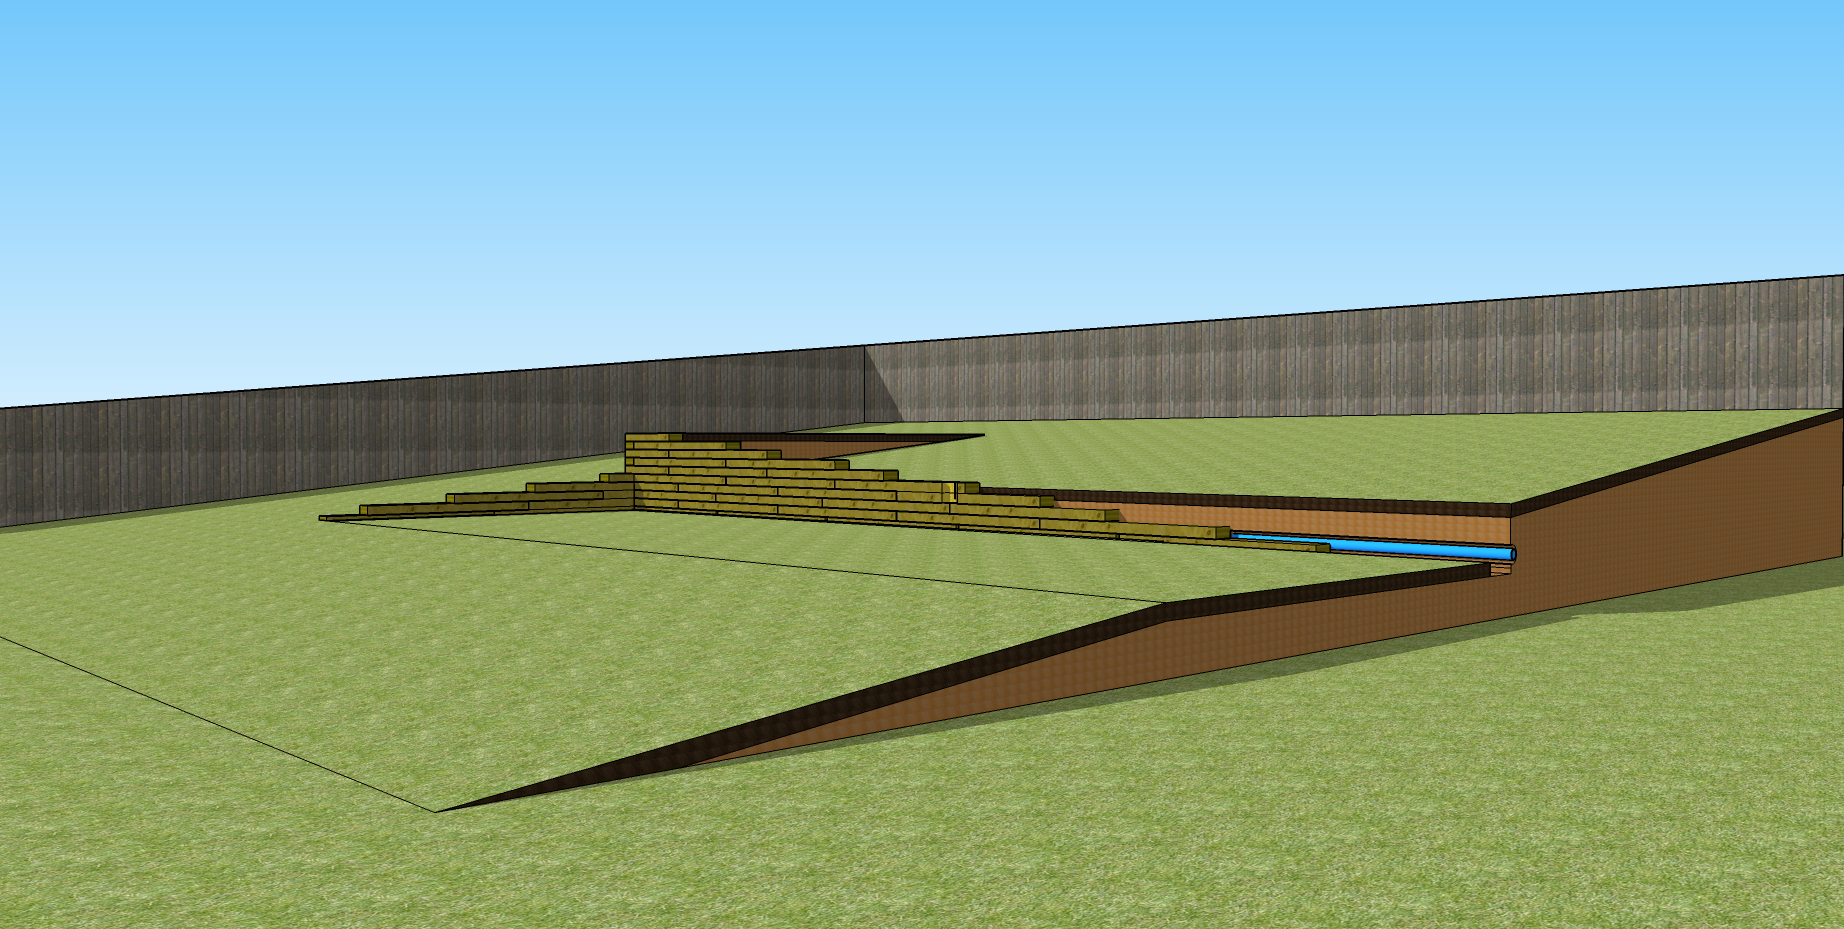
Equipment:
- Spade
- Sledge hammer
- Tape measure
- Pick axe
- Shovel
- Drill driver
- 190mm circular saw
- 200mm landscaping screws
- Sub-base
- Spirit level
- String line
- Square
- pencil
In Summary:
- Plan out your wall.
- Dig down to firm ground.
- Lay the first course of sleepers, levelling them with sub-base and leaving gaps for drainage.
- Install a drain behind the wall.
- Lay the next course, butting them together and staggering the joints.
- Screw the courses together.
- Repeat with subsequent courses until you reach the required height.
- Plan out you wall.
When deciding on the line of you wall think carefully about the space you need, always allowing for the thickness of the wall. For example if it’s along the edge of a path how wide does the path need to be? Not just to walk down but will you need to take wheelbarrows and lawnmowers? Also do you need to consider drainage, if all you are creating is a level area of soil on free draining land this is not going to be much of a problem but if on the other hand you are paving the area the water needs somewhere to go. Lastly what happens at the ends of the wall? If the end of the wall is near a fence or wall you are going to have to support that and you may need specialist advice.
- Dig down to firm ground.
Once you have marked out the line of the wall you need to excavate the excess soil, keeping the topsoil separate. Moving even small qualities of soil is hard heavy work and you are at the very least going to have to spread the work out. If there is much to move there are a large range of excavators available for hire and some will go through a standard doorway. (While excavators can save a great deal of work without care they can also do a great deal of damage!)
Once the area is cleared you can prepare the foundation for the sleepers. Make sure you are down to good solid ground and you can simply build up from that.
- Lay the first course of sleepers, levelling them with sub-base and leaving gaps for drainage.
First set up a string line along what will be the front edge of the bottom course of sleepers and lay sufficient subbase over the ground the sleepers are to be laid on to level them. Use no more subbase than is necessary, not thicker than 150mm, and lay the sleeper widest face down onto it. Bed the sleepers down onto the subbase with a sledge hammer to get them level. It is important to get the sleepers as level as possible as you will not be able to correct this later on. Make sure they are level not just along there length but also front to back or the wall will end up leaning either out or in.
- Install a drain behind the wall.
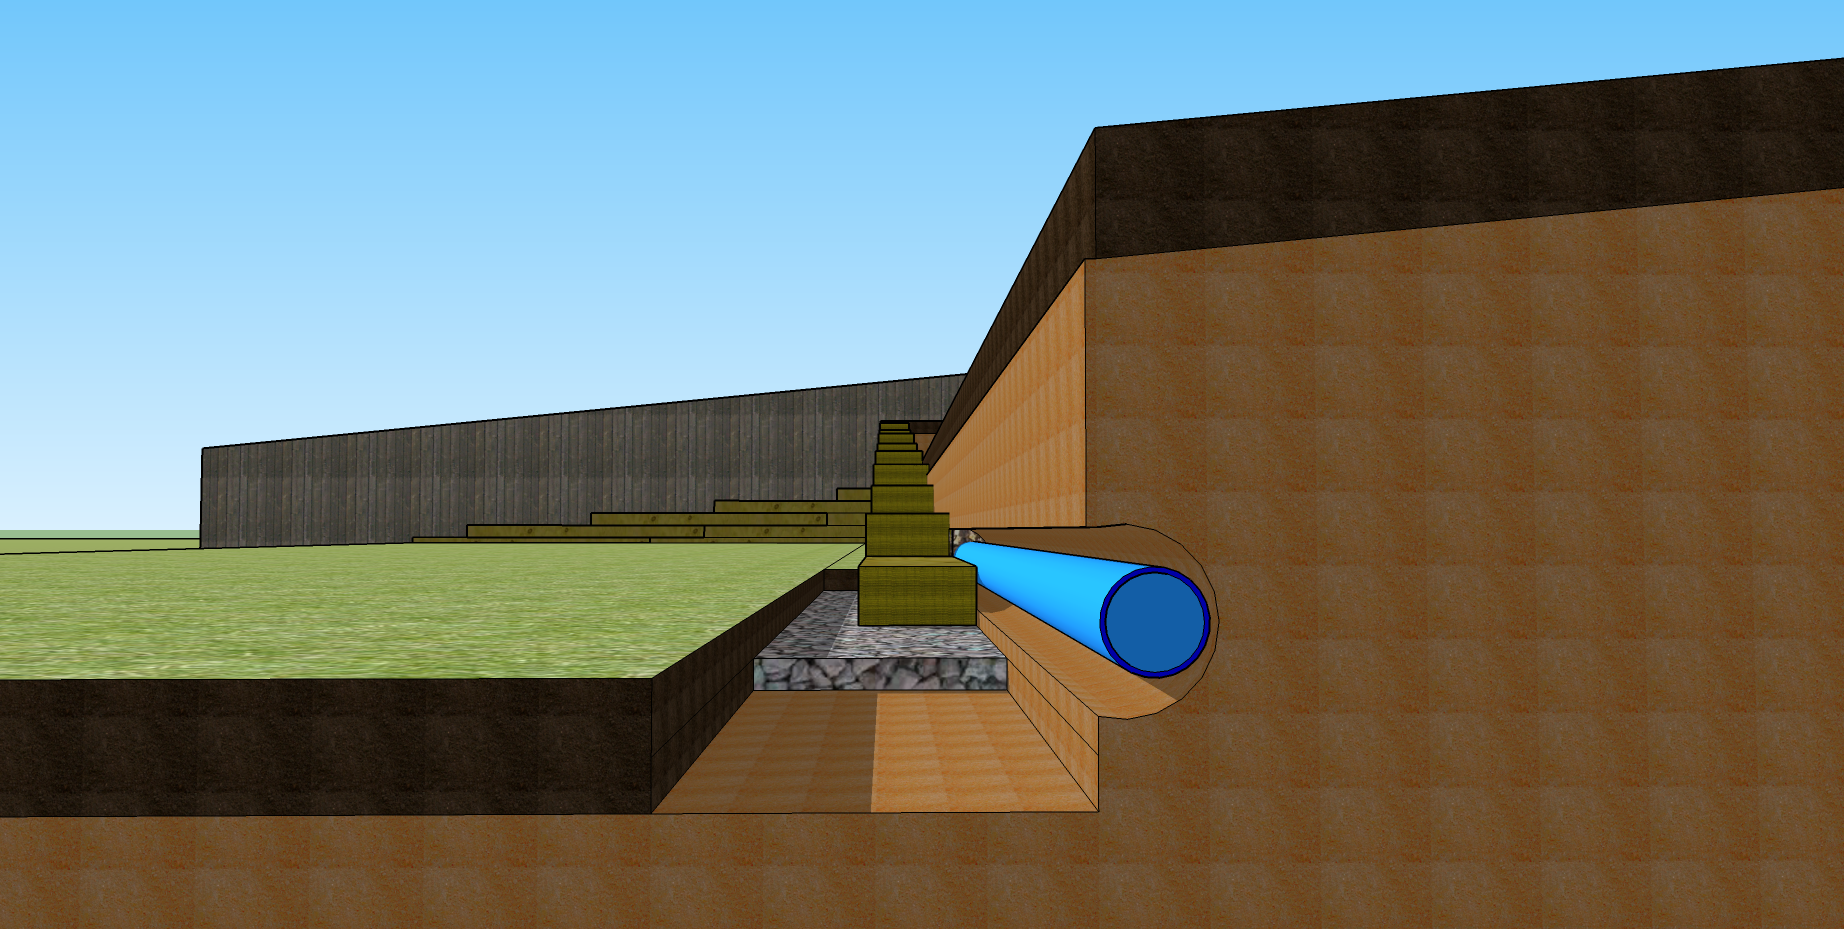 The new wall is going to block the natural drainage down the slope so level 50 mm wide gaps between the sleepers along the bottom course and put a length of perforated drainage pipe behind the sleepers and cover it with gravel to stop it blocking up with soil and roots. This should make sure any water behind the wall is collected up and can drain away.
- Lay the next course, butting them together and staggering the joints.
Once the first course and drainage are in place you can lay the second course on top of it, but starting with a short length to ensure the joints are staggered. To cut a sleeper measure off the length needed and make around the sleeper using a set square and pencil. Then simply cut the sleeper from both sides using a circular saw with a cutting depth just over half the sleeper’s thickness. The sleepers can then be laid butted up end to end and screwed into place. Screw the two courses together.
- Screw the courses together.
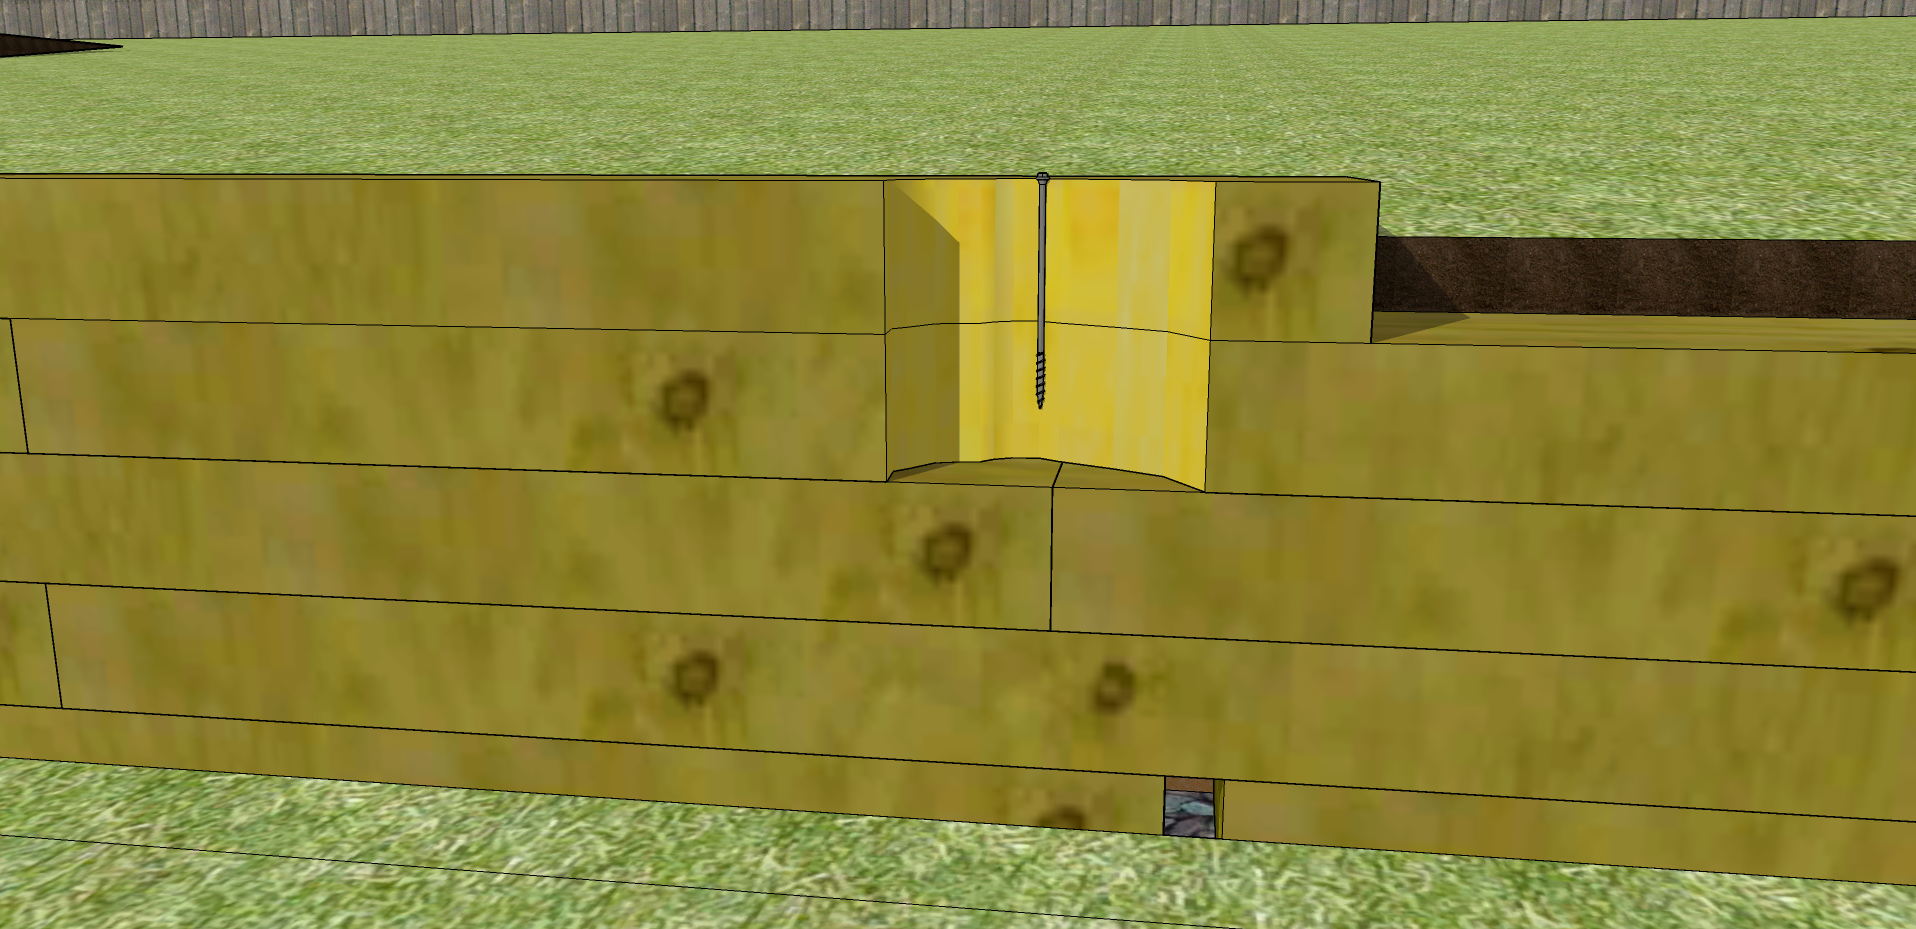 Use landscape screws at least 50 mm longer than the thickness of the sleepers with at least two to ever sleeper. These are driven in with a drill/driver.
- Repeat with subsequent courses until you reach the required height.
Keep adding courses as you did in parts 5 and 6 above until you reach the desired height making sure to stagger the joints between the sleepers.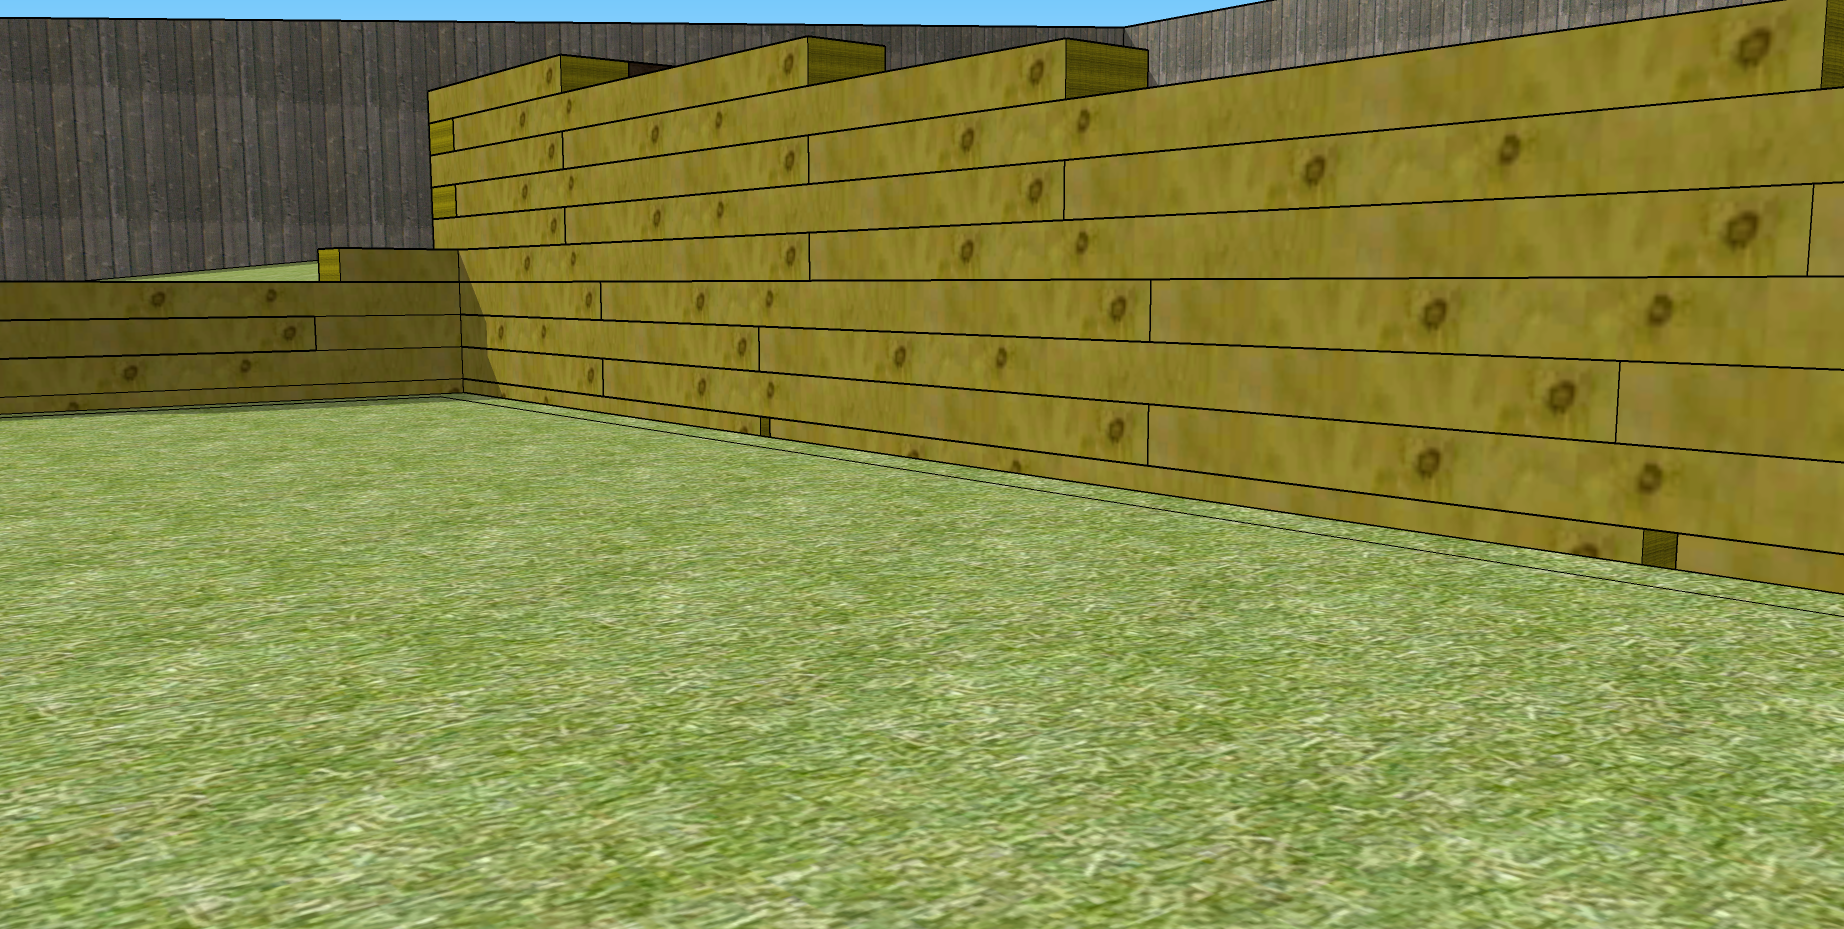
This technique will work well for low walls around the garden, including raised beds, and with a little ingenuity you can also built steps in!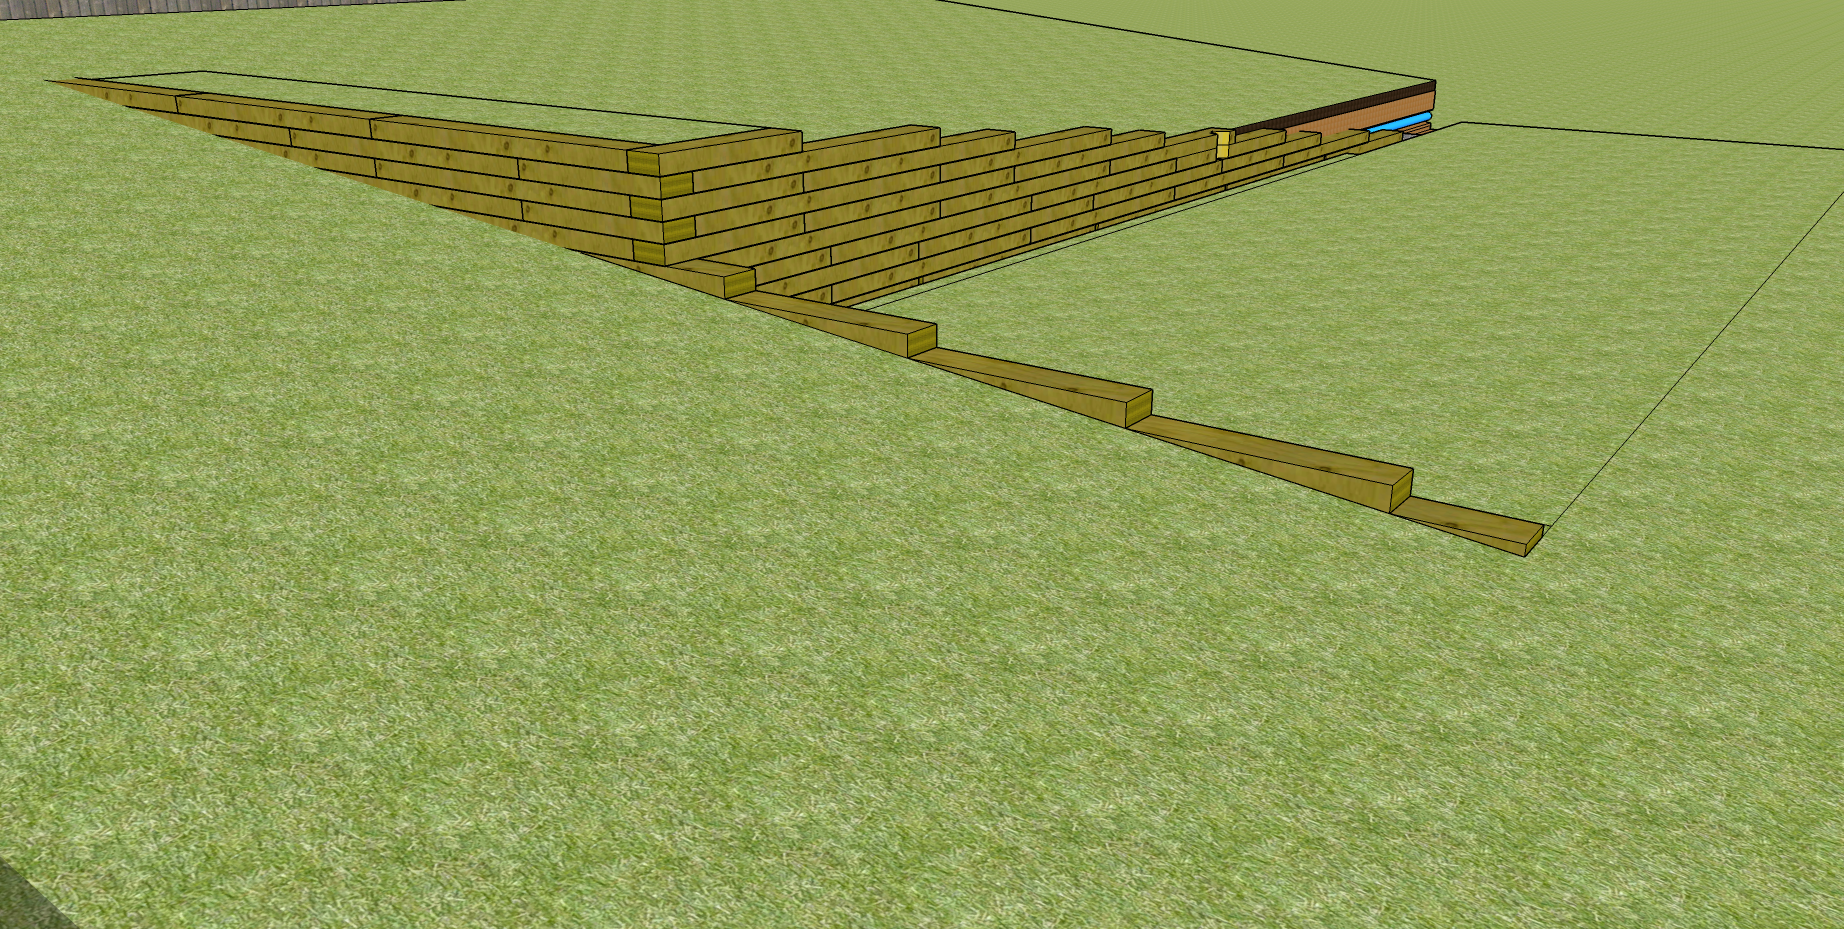
5 responses to “How to build a sleeper retaining wall”
With a sleeper wall on a slope would it be advisable to also cement posts behind the sleepers at intervals and bolt them up to prevent the soil above pushing over the wall?
I have also seen a method where a buttress with a T piece is buried horizontally into the slope to anchor the wall into the slope.
My only concern with retaining sleeper walls of height on a slope is that they need good vertical strength.
It really depends a lot on the height of the retaining wall. I’m not sure how much the posts would increase the support of the wall. In the past I have used a combination of the T pieces you mention, staggering the front of the wall and constructing the wall in steps staggered back. The last two make the wall a lot more visually pleasing and provide lots of opportunities for planting to soften the wall. If in doubt, if it’s a high wall and/or result of a collapse would be serious you need the advice of a structural engineer.
Hi Mark,
Brilliant explanation of the process, really clear wording and diagrams – thank you.
Quick question: What size aggregate would you use to create and level initial sleeper in the subbase , please?
By return, I’ll send you photo’s of our home project!
Best wishes,
Sarah
Hi Sarah,
You want to use a granular subbase under the sleepers to level them which you will get from a builder’s merchant. To estimate the quantity you will need 1 cubic meter weights about 2 tonnes. You will find it referred to by a variety of names including 40mm down, type 1, MOT type 1 and others.
Regards,
Mark
[…] Quote from the source: … […]